Hey there! I'm a supplier of the C/KU Multiband Feed System, and today I'm gonna walk you through how to install this awesome system on a vehicle. It might seem a bit daunting at first, but with the right steps and a bit of patience, you'll have it up and running in no time.
What is the C/KU Multiband Feed System?
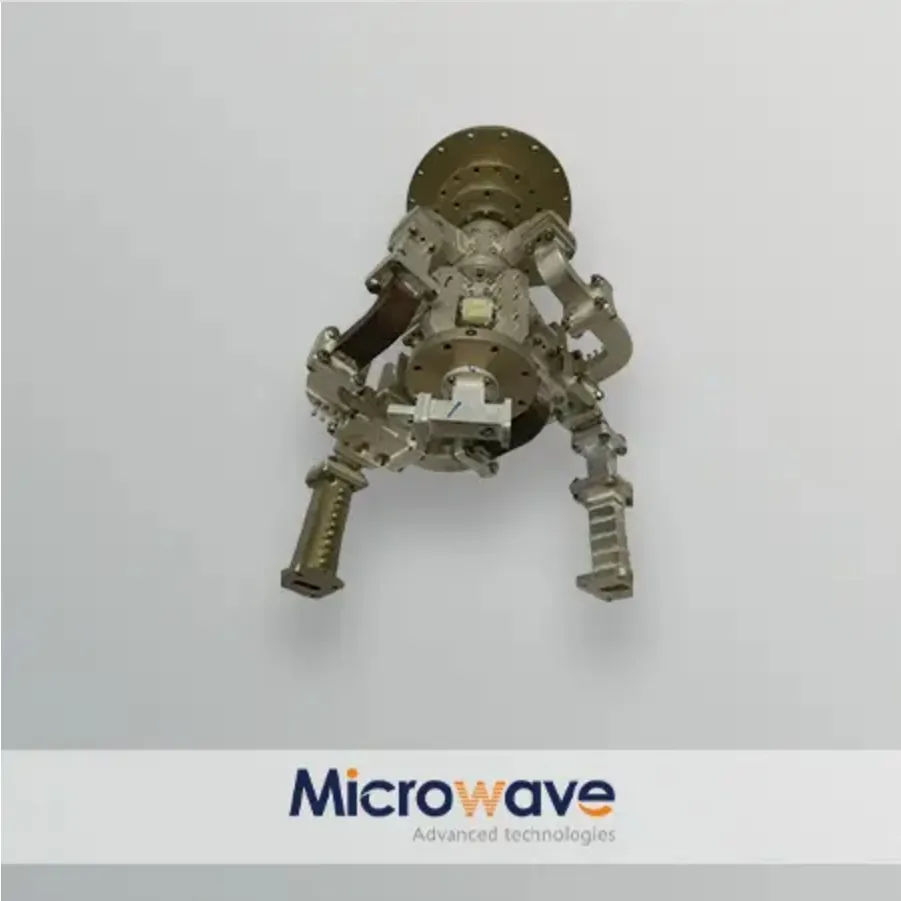
Before we dive into the installation process, let's quickly talk about what the C/KU Multiband Feed System is. This system is designed to receive signals from multiple frequency bands, specifically the C and KU bands. It's super useful for vehicles that need to stay connected while on the move, like RVs, trucks, and even some boats. With this system, you can enjoy high - quality satellite communication and entertainment, no matter where you are.
If you're interested in other types of feed systems, you can check out our Tracking Feed System and Ka&Ku Multiband Feed System. And if you only need a receive - only system, we also have the C/KU Multiband Receive Only Feed System.
Tools and Materials You'll Need
First things first, gather all the tools and materials you'll need for the installation. Here's a list to get you started:
- C/KU Multiband Feed System Kit: This should include the feed horn, LNBs (Low - Noise Block downconverters), and all the necessary cables and connectors.
- Drill and Drill Bits: You'll need these to make holes for mounting the system.
- Screwdriver Set: Both Phillips and flat - head screwdrivers will come in handy.
- Wrench Set: For tightening nuts and bolts.
- Level: To ensure the system is installed straight.
- Measuring Tape: To measure and mark the installation area accurately.
- Electrical Tape: To secure and insulate electrical connections.
- Antenna Mounting Bracket: This is usually included in the kit, but double - check.
Step 1: Choose the Right Location
The first step in installing the C/KU Multiband Feed System on your vehicle is to choose the right location. You want a spot that has a clear view of the sky, away from any obstructions like trees, buildings, or other parts of the vehicle. A good place is usually on the roof of the vehicle, but make sure it's structurally sound and can support the weight of the system.
Use your measuring tape to find the center of the roof or the area where you want to install the system. Mark this spot with a piece of tape or a pencil. Then, use the level to make sure the area is flat and level. If it's not, you might need to make some adjustments or find a different location.
Step 2: Mount the Antenna Bracket
Once you've chosen the location, it's time to mount the antenna bracket. Place the bracket on the marked spot and use the drill to make holes for the mounting bolts. Make sure the holes are the right size for the bolts that came with the bracket.
Insert the bolts through the holes in the bracket and the roof of the vehicle. Then, use the wrench to tighten the nuts on the underside of the roof. Make sure the bracket is securely attached and doesn't move around.
Step 3: Install the Feed Horn
Now it's time to install the feed horn. The feed horn is the part of the system that captures the satellite signals. Carefully attach the feed horn to the antenna bracket using the screws provided in the kit. Make sure it's centered and aligned properly.
Use the level again to check if the feed horn is straight. If it's not, adjust it until it is. This is important because a misaligned feed horn can affect the signal reception.
Step 4: Connect the LNBs
The next step is to connect the LNBs (Low - Noise Block downconverters). The LNBs are responsible for amplifying and converting the satellite signals into a lower frequency that can be processed by your receiver.
There are usually two LNBs in the C/KU Multiband Feed System, one for the C - band and one for the KU - band. Connect the coaxial cables from the LNBs to the corresponding ports on the feed horn. Make sure the connections are tight and secure. You can use a bit of electrical tape to wrap around the connections to prevent any moisture or debris from getting in.
Step 5: Run the Cables Inside the Vehicle
After connecting the LNBs, you need to run the coaxial cables from the feed horn inside the vehicle. You can do this by drilling a small hole in the roof near the antenna bracket. Make sure the hole is big enough for the cables to pass through, but not too big that it will let in water or air.
Feed the cables through the hole and into the vehicle. Then, use electrical tape to seal the hole around the cables to prevent any leaks. Inside the vehicle, you can route the cables along the walls or under the floor to the location where your satellite receiver is located.

Step 6: Connect the Cables to the Receiver
Once the cables are inside the vehicle, connect them to the corresponding ports on your satellite receiver. Make sure you connect the C - band cable to the C - band port and the KU - band cable to the KU - band port.
Use the screwdriver to tighten the connectors on the receiver to ensure a good electrical connection. Then, plug in the power supply for the receiver and turn it on.
Step 7: Align the Antenna
The final step is to align the antenna to get the best signal reception. This can be a bit tricky, but with a little patience, you'll get it right.
Most satellite receivers have a signal strength meter that you can use to help with the alignment. Start by pointing the feed horn in the general direction of the satellite. You can find the satellite's position using a satellite finder app or a satellite alignment chart.
Slowly adjust the angle of the feed horn up and down, and left and right, while watching the signal strength meter on the receiver. Keep adjusting until you get the strongest signal possible. Once you've found the best position, tighten the bolts on the antenna bracket to lock the feed horn in place.
Testing the System
After you've aligned the antenna, it's time to test the system. Try tuning in to some satellite channels on your receiver. If you're getting a clear picture and good sound, then congratulations! You've successfully installed the C/KU Multiband Feed System on your vehicle.
If you're having trouble getting a signal, double - check all the connections and make sure the feed horn is properly aligned. You might also need to adjust the position of the antenna slightly to get a better signal.
Conclusion
Installing the C/KU Multiband Feed System on your vehicle might seem like a complex task, but if you follow these steps and use the right tools, it's definitely doable. With this system, you'll be able to enjoy reliable satellite communication and entertainment on the go.
If you have any questions or need further assistance with the installation process, or if you're interested in purchasing our C/KU Multiband Feed System, don't hesitate to reach out. We're here to help you get the most out of your satellite experience.
References
- Satellite Communication Handbook
- Manufacturer's Installation Guide for C/KU Multiband Feed System